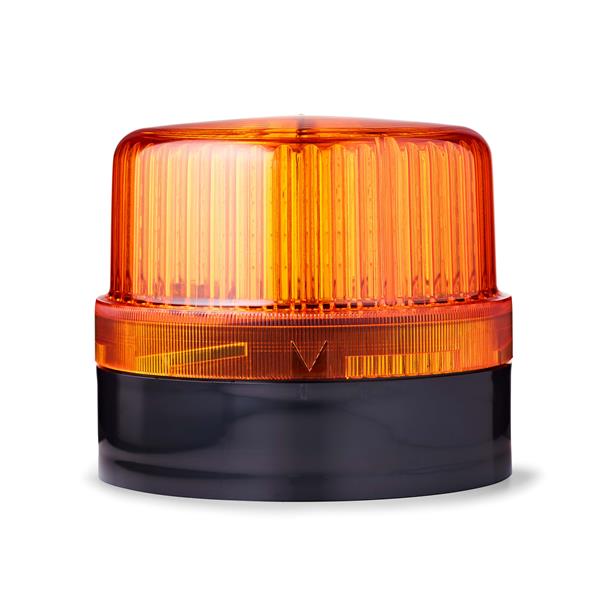
Beacons BLG LED flashing beacon 230-240 V AC amber, black
Notatki Badawcze
1. What this is
807501313 ("Auer Signal 807501313") is catalogued as a push-button / switch device from Auer Signal.
2. What we know
- Manufacturer: Auer Signal
- Category: push-button / switch device
- Part number / name: 807501313 — Auer Signal 807501313
- Auer Signal — see the manufacturer's catalog for this part.
3. How to identify / order the exact part
The full specifications for this part are not machine-decodable from the data we hold. To confirm the exact configuration (contacts, rating, colour, mounting, protocol), search the Auer Signal catalog for this part number on the manufacturer site or a distributor (DigiKey / Mouser / RS).
4. Data-quality note
This page is generated from the catalogued manufacturer, category, and product name. Per our keep-and-document policy we publish a page for every part we hold and state plainly what is known versus what needs verification, rather than deleting the row or inventing specs. Flagged needs-verification.
5. Sources
- Auer Signal product catalog — search "807501313" / "Auer Signal 807501313"
Verified distributor data (Mouser)
- Official distributor description: Beacons BLG LED flashing beacon 230-240 V AC amber, black
- Datasheet: https://www.mouser.com/datasheet/3/5974/1/097a9621_c137_4d33_8502_ef928b132d9e.pdf
- Price (from): 165.48 EUR
- Availability: In stock at Mouser (5)
This part is carried by Mouser Electronics; the description and datasheet above come straight from the distributor's catalog, confirming and expanding the part-number decode above.
Źródło
- Auer Signal 807501313 — distributor/catalog
Specyfikacje
|
Datasheet url
|
https://www.mouser.com/datasheet/3/5974/1/097a9621_c137_4d33_8502_ef928b132d9e.pdf
|
|
Device class
|
push-button
|
|
Enriched by
|
generic-fallback-2026-08-12
|
|
Lead time
|
0 Days
|
|
Mouser checked
|
2026-09-28
|
|
Mouser description
|
Beacons BLG LED flashing beacon 230-240 V AC amber, black
|
|
Mouser matched
|
true
|
|
Mouser part number
|
900-807501313
|
|
Pn status
|
verified
|
|
Rohs status
|
RoHS Compliant
|
Skrócona Instrukcja Montażu
Panel cutout: 22mm. Insert from the front of the panel, secure with mounting nut from behind (tighten to 2-3 Nm).
Contact block: Snap or screw the contact block onto the rear of the button body. Ensure the contact block orientation matches the wiring diagram — NO terminals are usually marked.
Wiring: Use 0.5-2.5mm² stranded wire with ferrules. Tighten screw terminals to 0.8 Nm. Test the button function before energizing the circuit.
Wymiary
Rozwiązywanie Problemów
Button doesn't respond when pressed
Check the contact block first — it's the most common failure point. Test continuity across the NO or NC terminals with a multimeter. If no click is felt, the return spring in the head may be broken.
Works intermittently
Contact block contacts are pitted or burned. Replace the contact block — don't try to file the contacts. Check if the rated cycle count has been exceeded.
Button feels mushy or doesn't click
The spring return mechanism in the button head is worn. Replace the head. The contact block can usually be reused if it tests OK.
Skrócone Specyfikacje
- Datasheet url
- https://www.mouser.com/datasheet/3/5974/1/097a9621_c137_4d33_8502_ef928b132d9e.pdf
- Device class
- push-button
- Enriched by
- generic-fallback-2026-08-12
- Lead time
- 0 Days
- Mouser checked
- 2026-09-28
Dowiedz się Więcej
Objaśnienie Klasyfikacji IP
Co oznaczają IP65, IP66, IP67, IP69K dla Państwa zastosowania
Przewodnik 22mm vs 30mm
Jakiego rozmiaru otworu montażowego potrzebujesz?
Bloki Styków: NO vs NC
Jak wybrać i podłączyć bloki styków
Narzędzie Wyszukiwania Przycisków
Znajdź właściwy przycisk wg typu, rozmiaru i koloru